
Halloween baking is a lot more fun when the treats look as festive as they taste. These 11 easy Halloween cookie recipes include classic sugar cookies, chocolate treats, spooky designs, and playful cookies that are perfect for Halloween parties, school treats, bake sales, or a cozy night of baking with family.
You don’t need advanced decorating skills for most of these recipes. A few simple ingredients, Halloween-shaped cutters, colorful icing, and a little creativity can turn an ordinary batch of cookies into something wonderfully spooky.
1. Halloween Sugar Cookies

Overview
These classic Halloween sugar cookies are soft in the center, lightly crisp around the edges, and perfect for decorating. The dough is easy to work with and can be cut into pumpkins, ghosts, bats, cats, or any other Halloween shapes you like.
They’re especially good for parties because you can decorate them in different colors and designs from the same batch of cookies.
Ingredients
- 2 ¾ cups all-purpose flour
- 1 teaspoon baking powder
- ½ teaspoon salt
- 1 cup unsalted butter, softened
- ¾ cup granulated sugar
- 1 large egg
- 2 teaspoons vanilla extract
- ½ teaspoon almond extract, optional
For decorating:
- 2 cups powdered sugar
- 2–3 tablespoons milk
- 1 tablespoon light corn syrup
- Orange, black, purple, or green food coloring
- Halloween sprinkles, optional
Instructions
- In a medium bowl, whisk together the flour, baking powder, and salt.
- In a separate large bowl, beat the softened butter and sugar until light and creamy, about 2–3 minutes.
- Add the egg, vanilla, and almond extract if using. Beat until combined.
- Gradually add the dry ingredients and mix just until a soft dough forms.
- Divide the dough into two portions, flatten into discs, wrap, and refrigerate for at least 1 hour.
- Preheat the oven to 350°F (175°C) and line baking sheets with parchment paper.
- Roll the dough on a lightly floured surface to about ¼-inch thickness.
- Cut into Halloween shapes using cookie cutters.
- Transfer the cookies to the prepared baking sheets, leaving a little space between them.
- Bake for 8–10 minutes, or until the edges are just beginning to turn lightly golden.
- Let the cookies cool on the baking sheet for a few minutes before transferring them to a wire rack.
- For the icing, whisk powdered sugar, milk, and corn syrup until smooth. Divide and tint with food coloring.
- Decorate the completely cooled cookies with icing and sprinkles. Allow the icing to set before serving.
Tips
- Don’t overbake the cookies if you want a soft center.
- Chill the dough again for 10–15 minutes if it becomes difficult to cut.
- For cleaner decorating, use piping bags with small round tips.
- Let decorated cookies dry completely before stacking them.
- Store in an airtight container for up to 5 days.
2. Chocolate Spider Cookies
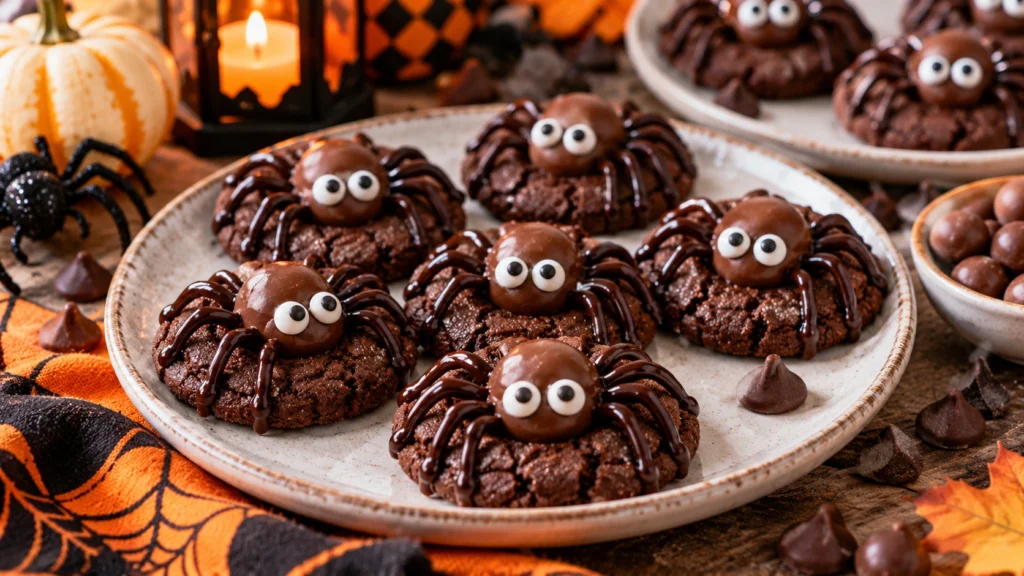
Overview
These rich chocolate cookies are soft, fudgy, and topped with chocolate candies and simple piped chocolate legs to create adorable edible spiders. They’re spooky enough for Halloween but still cute enough for kids.
Ingredients
- 1 ¾ cups all-purpose flour
- ½ cup unsweetened cocoa powder
- 1 teaspoon baking soda
- ½ teaspoon salt
- ½ cup unsalted butter, softened
- ¾ cup brown sugar
- ¼ cup granulated sugar
- 1 large egg
- 1 teaspoon vanilla extract
- ½ cup chocolate chips
- 18–22 chocolate-covered candies or truffles
- ½ cup melted chocolate
- Candy eyes, optional
Instructions
- Whisk together flour, cocoa powder, baking soda, and salt.
- Beat butter, brown sugar, and granulated sugar until creamy.
- Add the egg and vanilla and mix well.
- Gradually mix in the dry ingredients until combined.
- Fold in the chocolate chips.
- Chill the dough for about 30 minutes.
- Heat the oven to 350°F (175°C).
- Scoop dough into tablespoon-sized balls and place on parchment-lined baking sheets.
- Bake for 9–11 minutes.
- Immediately press a chocolate candy into the center of each warm cookie.
- Cool completely.
- Pipe melted chocolate around the candy to create eight spider legs.
- Add candy eyes if desired.
Tips
- Press the chocolate candy into the cookie while it’s still warm.
- Use a small piping bag for thinner, more realistic spider legs.
- Dark chocolate candies create the most natural spider appearance.
- Keep finished cookies in a cool place so the chocolate decorations remain firm.
3. Monster Eye Cookies

Overview
These colorful monster cookies are soft, chewy, and covered with candy eyes for a fun Halloween look. They’re especially easy to customize because you can use different eye sizes and colorful candies to make every cookie look slightly different.
Ingredients
- 2 ¼ cups all-purpose flour
- 1 teaspoon baking soda
- ½ teaspoon salt
- ¾ cup unsalted butter, softened
- ¾ cup brown sugar
- ½ cup granulated sugar
- 2 large eggs
- 2 teaspoons vanilla extract
- 1 cup white chocolate chips
- Green, purple, or orange food coloring
- Candy eyes
Instructions
- Combine flour, baking soda, and salt in a bowl.
- Beat butter and both sugars until creamy.
- Add eggs one at a time, followed by vanilla.
- Gradually mix in the dry ingredients.
- Fold in the white chocolate chips.
- Divide the dough into portions and tint with food coloring if desired.
- Chill for 20–30 minutes.
- Preheat the oven to 350°F (175°C).
- Scoop dough onto lined baking sheets.
- Bake for 9–11 minutes.
- Immediately press several candy eyes into the warm cookies.
- Allow the cookies to cool before serving.
Tips
- Use different sizes of candy eyes for a more playful monster effect.
- Don’t add candy eyes before baking because some may melt.
- For softer cookies, remove them from the oven when the centers still look slightly underdone.
- Use gel food coloring for brighter colors without adding excess liquid.

4. Witch Hat Cookies
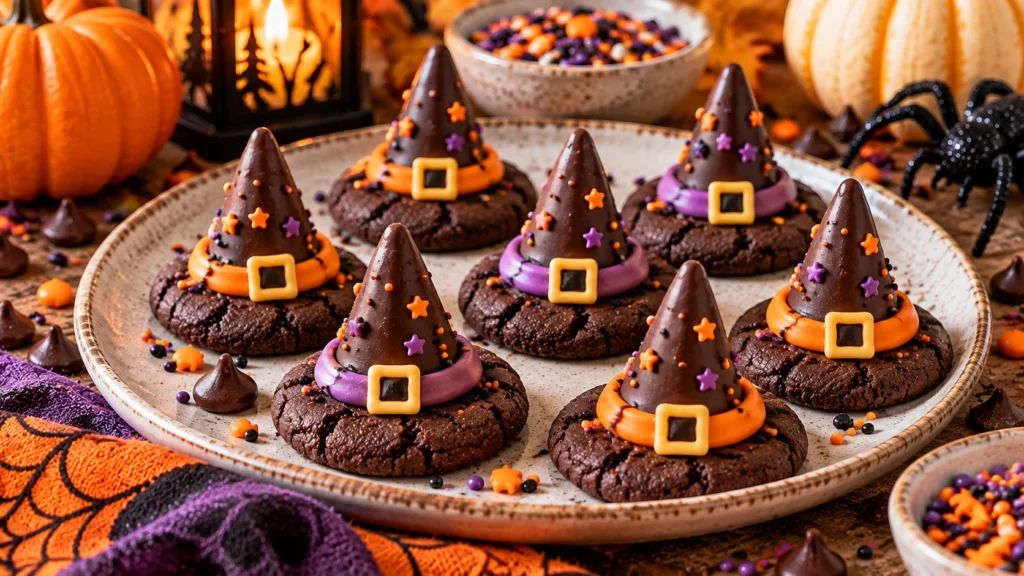
Overview
These no-fuss witch hat cookies are a great option when you want a Halloween dessert that looks impressive without complicated baking. Crisp chocolate cookies are transformed into little witch hats with chocolate-covered cones and colorful decorations.
Ingredients
- 24 chocolate wafer cookies
- 24 small chocolate or fudge-covered cone-shaped candies
- 1 cup semi-sweet chocolate chips
- ½ cup orange or purple decorating icing
- Halloween sprinkles, optional
Instructions
- Line a baking sheet with parchment paper.
- Melt the chocolate chips gently in the microwave in short intervals, stirring between each.
- Dip or brush the bottom of each cone-shaped candy with melted chocolate.
- Place each cone upright on a chocolate wafer cookie.
- Allow the chocolate to set.
- Pipe a thin band of orange or purple icing around the base of each cone.
- Add a small icing buckle or Halloween sprinkles.
- Let the decorations set completely before serving.
Tips
- Work with small batches so the melted chocolate doesn’t begin to harden.
- Refrigerate the finished cookies for 10–15 minutes to speed up setting.
- Use contrasting icing colors for a more noticeable witch-hat design.
- These are best assembled shortly before serving.
5. Pumpkin Spice Cookies

Overview
Soft, warmly spiced, and full of pumpkin flavor, these cookies are perfect for anyone who loves the cozy flavors of fall. A simple orange glaze gives them a festive Halloween appearance without requiring complicated decorating.
Ingredients
- 2 ¼ cups all-purpose flour
- 1 teaspoon baking soda
- ½ teaspoon baking powder
- ½ teaspoon salt
- 1 teaspoon ground cinnamon
- ½ teaspoon ground ginger
- ¼ teaspoon ground nutmeg
- ½ cup unsalted butter, softened
- ¾ cup brown sugar
- ½ cup pumpkin purée
- 1 large egg
- 1 teaspoon vanilla extract
For glaze:
- 1 ½ cups powdered sugar
- 2–3 tablespoons milk
- Orange food coloring
- ½ teaspoon vanilla extract
Instructions
- Whisk together flour, baking soda, baking powder, salt, cinnamon, ginger, and nutmeg.
- Beat butter and brown sugar until creamy.
- Add pumpkin, egg, and vanilla and mix until smooth.
- Gradually add the dry ingredients.
- Chill the dough for about 30 minutes.
- Preheat oven to 350°F (175°C).
- Scoop rounded tablespoons of dough onto lined baking sheets.
- Bake for 10–12 minutes.
- Cool completely.
- Mix the glaze ingredients until smooth and tint orange.
- Drizzle or spread the glaze over the cookies.
- Add simple green icing stems if desired.
Tips
- Use pure pumpkin purée rather than pumpkin pie filling.
- Don’t add too much glaze while the cookies are warm.
- Pumpkin cookies stay soft, so let them cool completely before storing.
- Add a pinch of cloves if you prefer a stronger pumpkin-spice flavor.
6. Mummy Cookies
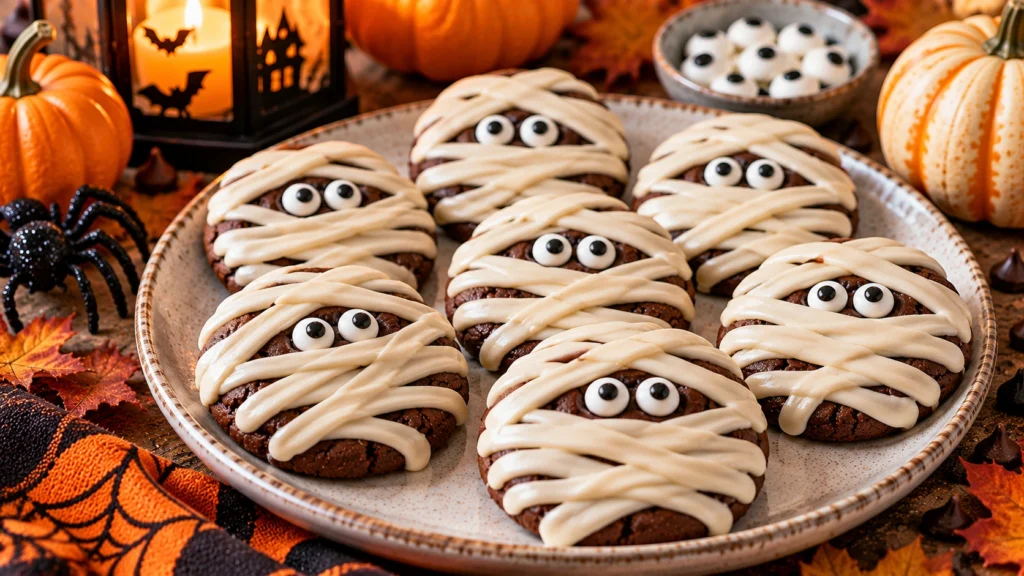
Overview
These adorable mummy cookies are one of the easiest Halloween treats to decorate. A simple chocolate or sugar cookie base is covered with white icing in uneven strips and finished with two candy eyes.
Ingredients
- 24 baked chocolate or sugar cookies
- 2 cups powdered sugar
- 2–3 tablespoons milk
- 1 tablespoon light corn syrup
- ½ teaspoon vanilla extract
- Candy eyes
- Black decorating icing, optional
Instructions
- Allow the baked cookies to cool completely.
- Whisk powdered sugar, milk, corn syrup, and vanilla until smooth.
- Transfer the icing to a piping bag with a small round tip.
- Pipe irregular lines across each cookie, leaving small gaps so the cookie underneath remains visible.
- Place two candy eyes near the upper portion of each cookie.
- Add tiny dots of black icing around the eyes if desired.
- Let the icing dry completely before serving.
Tips
- Don’t make the icing strips too uniform—slightly uneven lines make the mummies look more fun.
- Use chocolate cookies for a dramatic black-and-white contrast.
- Let the cookies sit uncovered until the icing becomes firm.
- You can make these with store-bought cookies when you’re short on time.

7. Black Cat Cookies

Overview
These chocolatey black cat cookies bring a little Halloween magic to your dessert table. Their simple cat silhouette makes them perfect for cookie cutters, while chocolate icing and small candy details create the face.
Ingredients
- 2 ¼ cups all-purpose flour
- ½ cup unsweetened cocoa powder
- ½ teaspoon baking powder
- ½ teaspoon salt
- ¾ cup unsalted butter, softened
- ¾ cup granulated sugar
- 1 large egg
- 1 teaspoon vanilla extract
For decorating:
- 1 ½ cups powdered sugar
- 2 tablespoons cocoa powder
- 2–3 tablespoons milk
- Small candy eyes
- Orange decorating icing
Instructions
- Whisk flour, cocoa powder, baking powder, and salt.
- Beat butter and sugar until creamy.
- Add egg and vanilla.
- Gradually mix in the dry ingredients.
- Wrap the dough and chill for at least 1 hour.
- Preheat oven to 350°F (175°C).
- Roll the dough to about ¼-inch thickness.
- Cut into cat-shaped cookies.
- Bake for 8–10 minutes.
- Cool completely.
- Mix powdered sugar, cocoa powder, and milk to make a thick chocolate icing.
- Spread or pipe icing over the cookies.
- Add candy eyes and use orange icing for noses, mouths, or collars.
Tips
- Chill the cut cookies for 10 minutes before baking for sharper shapes.
- Use a thick icing so it doesn’t run over the edges.
- Orange icing details create a classic Halloween look.
- Store decorated cookies in a single layer until the icing has fully hardened.
8. Ghost Sugar Cookies

Overview
These soft sugar cookies are cut into simple ghost shapes and decorated with smooth white icing and tiny dark eyes. They’re easy enough for beginner bakers and make a charming addition to any Halloween dessert table.
Ingredients
- 2 ¾ cups all-purpose flour
- 1 teaspoon baking powder
- ½ teaspoon salt
- 1 cup unsalted butter, softened
- ¾ cup granulated sugar
- 1 large egg
- 2 teaspoons vanilla extract
For decorating:
- 2 cups powdered sugar
- 2–3 tablespoons milk
- 1 tablespoon light corn syrup
- Black decorating icing
Instructions
- Whisk flour, baking powder, and salt.
- Beat butter and sugar until light and fluffy.
- Add egg and vanilla.
- Mix in the dry ingredients until a dough forms.
- Chill the dough for at least 1 hour.
- Heat oven to 350°F (175°C).
- Roll the dough to about ¼-inch thickness.
- Cut out ghost shapes.
- Bake for 8–10 minutes.
- Cool completely.
- Mix powdered sugar, milk, and corn syrup until smooth.
- Pipe or spread white icing over each cookie.
- Once slightly set, add two small black eyes and a tiny mouth.
Tips
- Use a small round piping tip to create neat ghost faces.
- Keep the icing thick enough to stay inside the cookie edges.
- Let the icing dry completely before stacking.
- For a fun variation, add tiny orange or purple sprinkles.
9. Candy Corn Cookies

Overview
These cheerful cookies recreate the classic Halloween candy corn colors in a soft, buttery cookie. They’re especially fun because the dough itself creates the striped appearance, so you don’t need complicated icing skills.
Ingredients
- 2 ½ cups all-purpose flour
- 1 teaspoon baking powder
- ½ teaspoon salt
- 1 cup unsalted butter, softened
- ¾ cup granulated sugar
- 1 large egg
- 1 teaspoon vanilla extract
- Yellow food coloring
- Orange food coloring
Instructions
- Whisk together flour, baking powder, and salt.
- Beat butter and sugar until creamy.
- Add egg and vanilla.
- Mix in the dry ingredients until a soft dough forms.
- Divide the dough into three equal portions.
- Leave one portion plain.
- Tint one portion yellow and another orange.
- Roll each portion into a long rope of similar thickness.
- Place the three ropes side by side and gently press them together.
- Chill the assembled dough for about 30 minutes.
- Slice into small triangles.
- Arrange on parchment-lined baking sheets.
- Bake at 350°F (175°C) for 9–11 minutes.
- Cool before serving.
Tips
- Use gel food coloring for bright colors.
- Don’t overmix after adding the food coloring.
- Keep the three dough ropes approximately the same size.
- Chill the dough before slicing to keep the stripes defined.

10. Chocolate Bat Cookies
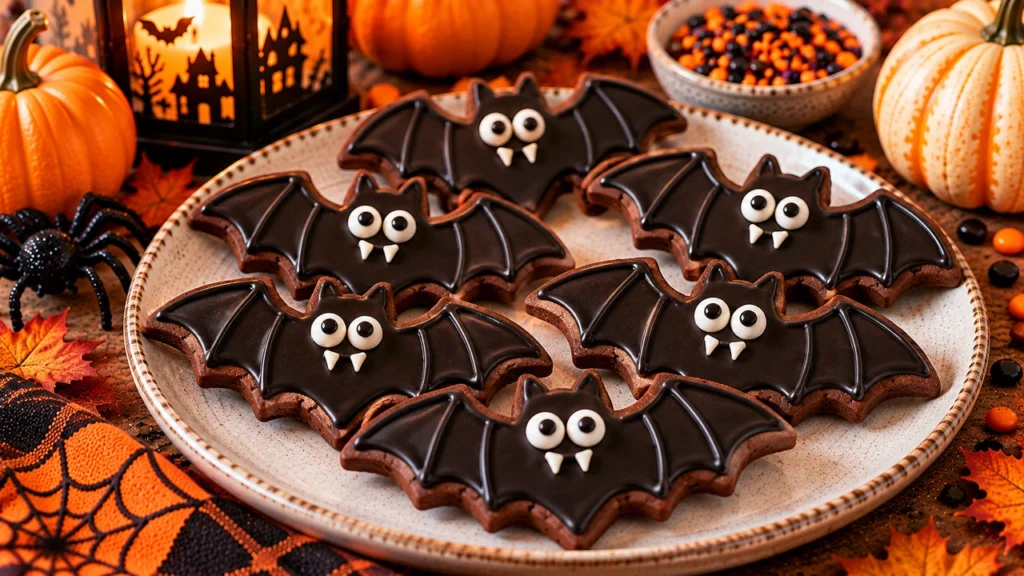
Overview
These chocolate bat cookies are rich, crisp around the edges, and full of cocoa flavor. A simple bat-shaped cutter turns an everyday chocolate cookie into a spooky Halloween treat.
Ingredients
- 2 cups all-purpose flour
- ½ cup unsweetened cocoa powder
- 1 teaspoon baking powder
- ½ teaspoon salt
- ¾ cup unsalted butter, softened
- ¾ cup granulated sugar
- 1 large egg
- 1 teaspoon vanilla extract
Optional decoration:
- 1 cup powdered sugar
- 1–2 tablespoons milk
- Black or purple food coloring
- Halloween sprinkles
Instructions
- Whisk flour, cocoa powder, baking powder, and salt.
- Beat butter and sugar until smooth.
- Add egg and vanilla.
- Gradually mix in the dry ingredients.
- Chill the dough for at least 1 hour.
- Preheat oven to 350°F (175°C).
- Roll dough to approximately ¼-inch thickness.
- Cut out bat shapes.
- Transfer to parchment-lined baking sheets.
- Bake for 8–10 minutes.
- Cool completely.
- Decorate with a thin glaze, sprinkles, or leave them simply chocolate-colored.
Tips
- Dip the cookie cutter lightly in flour between cuts if the dough sticks.
- Don’t roll the dough too thin or the bat wings may break.
- For a simple finish, dust the cooled cookies lightly with powdered sugar.
- Chocolate cookie dough can be prepared a day ahead and refrigerated.
11. Witch’s Finger Cookies

Overview
Witch’s finger cookies are one of the most recognizable Halloween treats, and their creepy appearance is surprisingly easy to create. A buttery almond cookie dough is shaped into fingers, finished with almond “fingernails,” and lightly colored around the edges for a spooky effect.
Ingredients
- 2 ½ cups all-purpose flour
- 1 cup unsalted butter, softened
- ¾ cup powdered sugar
- 1 large egg
- 1 teaspoon vanilla extract
- ½ teaspoon almond extract
- ½ teaspoon baking powder
- ½ teaspoon salt
- Whole blanched almonds
- Red decorating gel, optional
Instructions
- Whisk flour, baking powder, and salt.
- Beat butter and powdered sugar until smooth.
- Add egg, vanilla, and almond extract.
- Gradually mix in the dry ingredients until a soft dough forms.
- Refrigerate the dough for about 30 minutes.
- Preheat the oven to 350°F (175°C).
- Take small portions of dough and roll them into finger-shaped pieces.
- Place them on a parchment-lined baking sheet.
- Use a knife to gently create two or three lines where the knuckles would be.
- Press a whole almond onto the end of each finger to create the fingernail.
- Bake for 10–12 minutes, until lightly golden around the edges.
- Cool completely.
- For an extra creepy effect, add a small amount of red decorating gel around the almond nail.
Tips
- Don’t make the fingers too thick because they expand slightly while baking.
- Slightly bend some of the fingers for a more realistic appearance.
- Press the almonds firmly into the dough before baking.
- If the dough becomes sticky, refrigerate it for another 10–15 minutes.
- Store in an airtight container for up to 5 days.
🎃 Final Thoughts
Halloween cookies don’t have to be complicated to make an impression. With a few simple shapes, colorful icing, chocolate, candy eyes, and classic fall flavors, you can turn a basic cookie recipe into something that feels special for the season.
Whether you’re baking with kids, preparing treats for a Halloween party, or simply looking for something fun to make on a fall afternoon, these 11 Halloween cookies give you plenty of options to try. Start with the easy designs and work your way toward the more detailed cookies as your decorating confidence grows.